Thursday 30 September 2010

THIS LIFE

Hi All

Been so busy making stuff up for my craft fairs that I needed a bit of a break from it.  I went back to where I started, scrapbooking.   I've got a box full of photos I want to scrap so I started with this one.  It's of my hubby when we were out walking last autumn at Castle Martin, which is just a few miles from us. 


There is a a tiny church here that is built into the rock face and it has a lot of very steep and narrow steps down to it from the cliff edge, the church being near the sea edge. It could only have held about 10 people in it! Why on earth it was built here. Once you get past the church though, there are massive boulders to climb over to get down to the sea, I stopped here and took a pic, the rest of the walk he did alone, it was way to dodgy for me to finish!


I created the outline on the photo in Adobe Photoshop and added the text.  I like to keep these things simple so just added a bit of journalling and a small circle of patterned paper to it with a large brad at the top.

Hope you're having a good day.
Hugs
Zoe x

Sunday 26 September 2010

A DAY WITHOUT YOU

Hi All

Today's post is a scrap page  and its about how I feel about my wonderful husband.  He does have to spend a few days a month away from home because of his job and although that gives me the chance to get a load of crafty bits done without having to worry about dinner and ironing! - I do miss him when he's not here.  Noises in the night aren't the problem, I don't hide under the sheets at the slightest knock or anything like that but I do miss a chat and a catch up on our day.


The picture was taken at a friends wedding and has lots of memories associated with it but essentially this is just about us.

I had a little heart & sentiment button hanging around and used them here along with the H (for husband) sticker.  I've had these ages so no idea where they came from.  I scour the web for nice little quotes and phrases and this one just summed it all up nicely for me.

Hugs
Zoe

60 YEARS OLD AND 70 YEARS YOUNG!

Hi all, hope you’re having a great day.


Today it’s a real quickie. I was asked to make up some cards for a 60th and a 70th birthday so thought I’d just share these with you. Apologies for the photo quality, these were taken at night and under the lights in my kitchen so they are bit... oh what's the word... RUBBISH!


I am unsure what I think about these - I like them and then again I don't. It's funny how you get a brief from someone, you do it and it's not always how you would have done but its what they want. HOWEVER, the person I made them for was delighted with them so that’s the main thing.


I said it was a quick one didn’t I – blink and you’d have missed it!


Catch you soon
Hugs
Zoe x


Thursday 23 September 2010

AN AWARD!

I was really surprised and very flattered when I was passed an award from a truly fab blog buddy recently and have only just gotton around to sharing it with you!  

I can't tell you how much that made me smile and I was soooo excited!  I've only been blogging for a short while really and it was great to know that someone likes what I create.

Sooo...

 THANK YOU SO MUCH Steph 
you are a sweetheart and I love ya!


I've got lots of things coming up to share (once I've finished some of them that is!) so check back soon.
Take care all.
Hugs
Zoe x

Monday 20 September 2010

IS THIS WAY TOO EARLY?!!

Hi all

Sorry I’ve not posted for a while, my BT broadband, which is totally rubbish, has been even slower than normal and I’ve been unable to do anything, let alone load up a post here! It’s is so frustrating spending hours on the phone in queues, talking to someone from every department they seem able to pass you around to but ending up back where you started… a crap service and nothing gets done about it… AAHHHHHHHHHH! We pay for ‘Up to 8mb’ but we only actually receive ½ a MB and as it has now virtually ground to halt most nights, it’s been pretty impossible to get anything done!

However, the upside of this has been that I’ve spent far less on eBay recently – I am a last minute bidder and by the time my bid actually goes through, the item had ended! Saved a small fortune so I suppose that’s something.

Anyhoo, that’s got that off my chest so enough whingeing for today, let’s get on with something far more interesting.

I’ve been trying to get myself ahead this year on my Christmas bits and bobs as I normally end up running out of time. So this year, I was determined to get ahead of the game. I’ve finished making all my cards to send (will post some pics of these later) and as I have three big craft fairs coming up, one in Oct, Nov and Dec as well as a smaller craft market every Friday now, I started to think about gifts to sell.


I found this fab template for a sleigh last year and made 30 of them for someone who wanted something different to put on the table for everyone on Christmas day than the run-of-the-mill cracker (they have a VERY large family and an even larger house to fit them all in!). I made the sleigh’s the size of the actual template and we filled them with a joke each, a little gift and a party hat along with a name place card. They looked fab and I only wish I had taken a picture of them!

For the ones I’ve just made up I wanted them bigger to hold the gifts I need to put in them so I enlarged the template by 50% on a copier as I want to sell them at my craft fair.

The sled base normally has a bit more to it to raise the sleigh off the ground a bit but because I want to put heavier things in these, I trimmed that part off and fixed it flush to the base for sturdiness.


I’ve made up 8 so far in four different colours and I am really, really pleased with them. I want to make up some adult ones which I’ll fill with some shredded tissue paper with small jars of preserves or shortbread or something along those lines on top, then wrap them in florist cellophane with a big colourful bow on top and a mini card and envelope to write on. Once I’ve actually bought all this stuff and made them up properly I will post a ‘completed’ pic for you!  Some will be filled with sweets or other little gifts for the kiddies, not quite decided what yet. I’ve ordered some little brass bells, which I will hang on to each sleigh but they haven’t arrived yet so these pics are a little unfinished but couldn’t wait to share.


Now for the bits I used…

For my base cardstock I used Dark Chocolate from PTI because it’s a good quality heavy cardstock, the glitter paper is fab and is from Craftime which I bought on QVC a few years ago (I don’t know if they still sell it but you may be able to find some on Craftime’s website – http://www.craftime.com/). Its on a really thick mulberry paper base and its really glittery (well you know what I mean!). The snowflakes where punched from glittered DCWV cardstock and the punch is from Martha Stewart. I just added a few coloured gems to the centre of each one for a bit more bling.  Finished it all off with a bit of ribbon tied around it.  Once my bells arrive, these will be tied to the centre of the ribbon.


I think the blue one is my favourite colour. I like these so much I’ll find it difficult to sell them, I want to keep them ALL!!! I guess I’ll just have to make some more!

If you want the template, it’s from Clear and Simple Stamps and the best bit is - IT’S FREE!!! It can be found here…

http://www.clearandsimplestampsonline.com/cssdownloads/TOTM/CSS-SleighTemplate.pdf

Hope you’ve had a fab day everyone.

Thanks, as always for popping along to see what I’ve been up to.

Take care

Zoƫ x

Monday 13 September 2010

MY HEART IN YOUR HANDS


It's another Magnolia creation today folks.  These stamps are fab, I really love using them.  Following my previous attempt at roughing up the edges (see last post) I had another go but I inked the edges also which I think works much better.  I stamped the sentiment and then bent it slighty and fixed it with some small foam pads to keep its shape.


Once I'd coloured her in, I added a touch of glitter to the heart and her stockings then mounted her onto my card.  To finish it off I glued on some of those gorgeous flowers with some punched leaves underneath.  Patterned paper  and sentiments are PTI, punched border is Anna Griffin, image coloured with Copics.

Gotta scoot, Tesco is awaiting - got friends coming for dinner later and need to get my a*** in gear else we shall be living off some bread rolls and cheesecake tonight!

Hugs
Zoe x

Friday 10 September 2010

A LITTLE ROUGH AROUND THE EDGES


It's nice sometimes to rough things up a little.  For this I stamped the leaf and flower pattern onto white textured cardstock and then rolled up the edges with my finger just a little. It lifts it off the card just a tad and makes the image stand out more.

Whilst I was making this up, my dog Dylan was sleeping on the sofa in my workroom and I just had to share a couple of shots with you cause he's so god dam cute!  He was all curled up too.


He must have got a bit loney because later he shared his bed with bid best bud Woody and his favorite stuffed toy for the evening.


I could just MELT!

Catch up with you all soon.
Hugs
Zoe x

Monday 6 September 2010

SWEETHEART


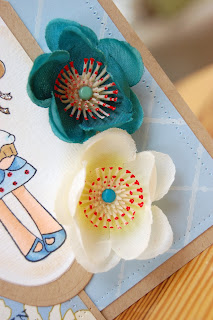
My bargain flowers have certainly come in handy recently.    For this card, I stamped and coloured my image and cut it out with a spellbinder die which was too big for the card so I trimmed it on the left and right sides and mounted on a second trimmed die. I stamped some blue cardstock with white ink using a edging stamp in a criss cross pattern and mounted on my card base.  I attached the patterned cardstock to a strip of the base cardstock then used my sewing bradle to make the fake stitching around the edges of each, attached my ribbon and little heart and finally the flowers.


Thanks for looking.
Zoe x


Thursday 2 September 2010

CURVE IT


Hi all, today's post is a standard card but with a slight difference. 

I saw a similar design recently and wanted to give it a try myself.  Just taking a small amount off the base of the front of the card in a gradual curve really does make this card stand out, despite the pretty simple design on it.  I've since made a similar card but with the back cut the same way so the card rocks a little.  Great for a baby card. 

I used an oval gravy boat plate for my curve template as my freehand on anything except a straight line is pretty rubbish and this needs to look even on both sides.


Having the ribbin tied just above the start of the curve draws your eye to it.

The image is from Magnolia and has been coloured with Copics, the cardstock has been stamped with PTI Polka Dot Basics, sentiment also PTI.

Zoe x